- 0
- 927 words
Learning how to light fire is a fundamental outdoor skill, whether you’re camping, backpacking, or just enjoying a backyard fire pit. A successful fire is not about brute force — it’s about using the right materials, structure, and safety awareness. This post walks you through everything you need to know, from preparing your site to keeping your fire burning steadily and extinguishing it responsibly when you’re done.
Understanding the Basics of Fire
Before you light fire, it’s important to understand what fire needs to survive. All fires — from a small campfire to a backyard fire pit blaze — operate on the “fire triangle”: heat, fuel, and oxygen. When these three elements are in balance, a flame can both start and continue to burn. Remove any one of them, and the fire will die out.
What You’ll Need to Light Fire
Essential Materials
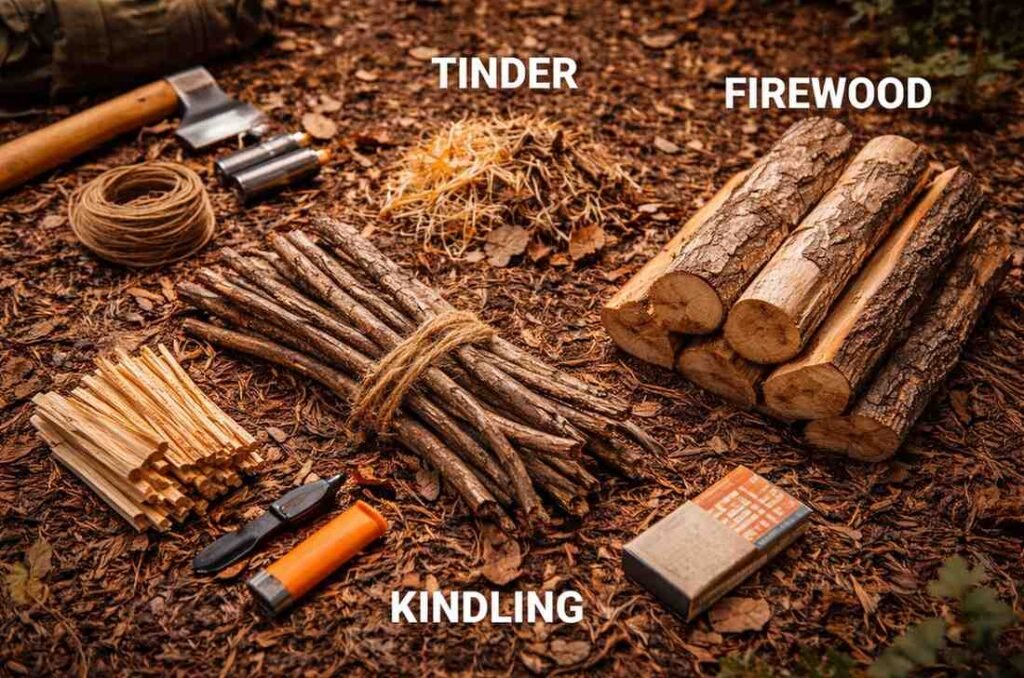
To start and maintain a fire successfully, organize your fuel into three groups:
- Tinder: Small, highly flammable materials like dry grass, wood shavings, dry leaves, or paper — these help catch the initial spark.
- Kindling: Small sticks and twigs about the width of a pencil. These help build up the flame from the tinder layer.
- Firewood: Larger, dry logs that sustain the fire once it’s burning. Look for seasoned wood that’s free of moisture.
How to Light Fire: Step‑by‑Step Guide
1. Choose a Safe Location
Pick a spot at least several feet from tents, overhanging branches, or flammable structures. If possible, use a designated fire ring or pit. Clear away leaves, grass, and debris to create a safe zone.
2. Prepare Your Fire Pit
If there’s no existing fire ring, dig a shallow pit and surround it with rocks. This helps contain the fire and keeps it stable. Place a bucket of water or sand nearby before you light fire for safety reasons.
3. Build Your Fire Structure
There are several effective ways to arrange your fuel materials:
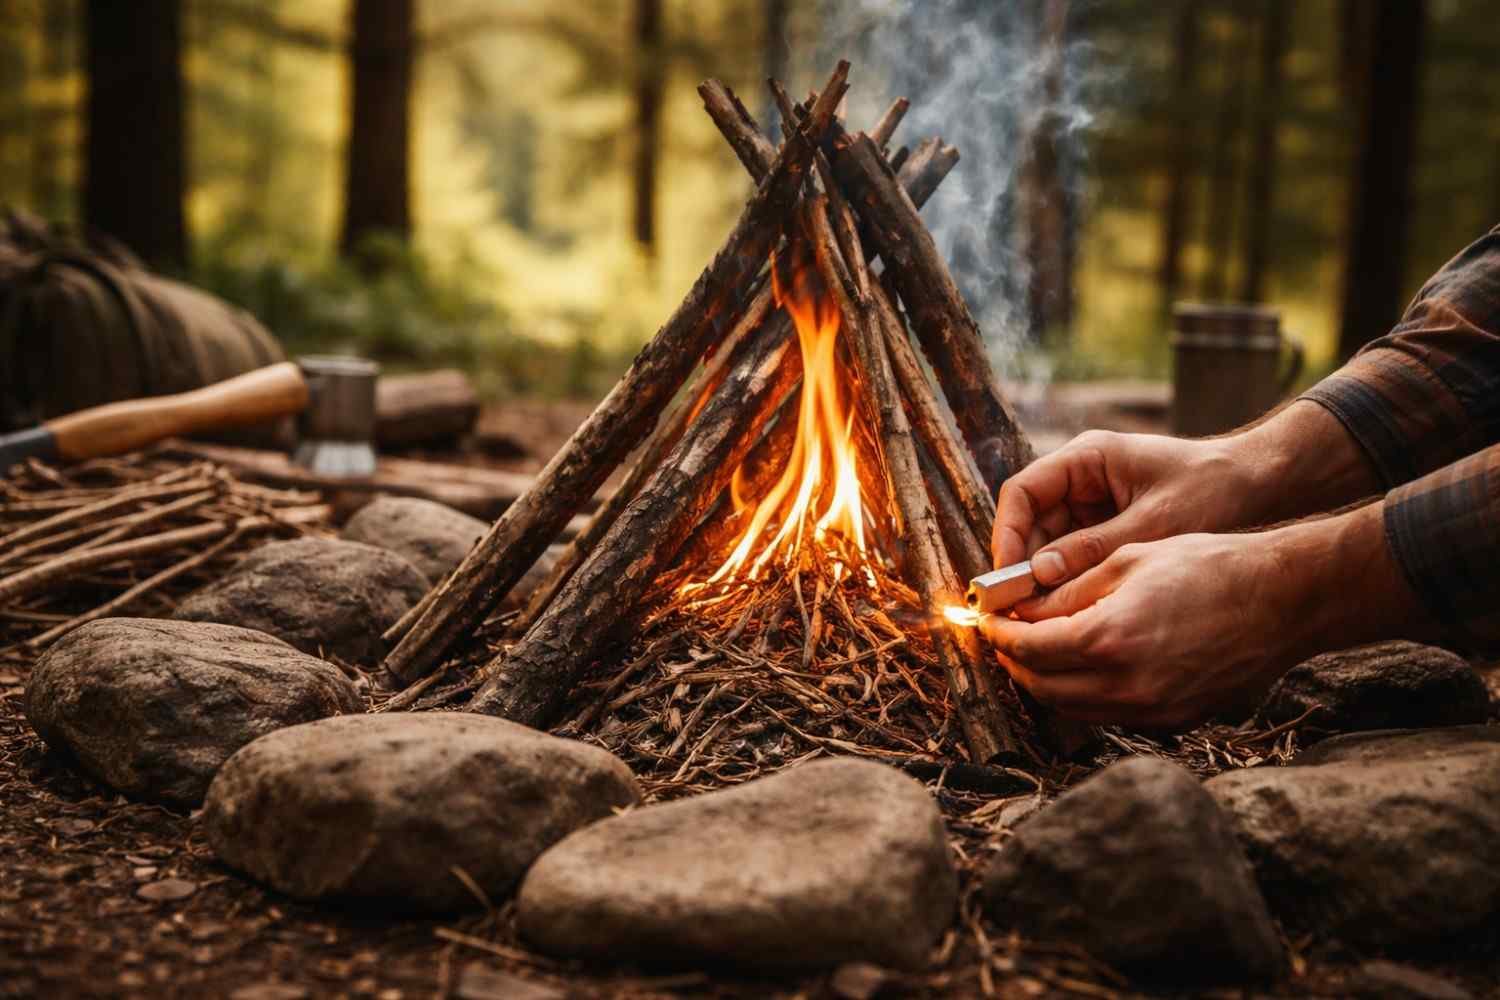
Teepee Fire Structure
- Place a bundle of tinder in the center.
- Form small sticks and kindling around it like a cone.
- Leave a small gap where you’ll light the tinder.
This structure promotes airflow and helps the fire catch quickly.
Log Cabin Structure
- Start with a small teepee of tinder and kindling.
- Stack larger logs around it in a square pattern, alternating layers.
This builds a more robust fire that burns steadily and is ideal for cooking.
4. Ignite the Tinder
Use matches, a fire starter, or a lighter to ignite the tinder. Light it from the windward side so the flame spreads naturally into the structure. Avoid accelerants like gasoline or kerosene, as these are dangerous and can cause uncontrollable flare‑ups.
5. Feed the Fire Gradually
As the tinder catches, the kindling will begin to burn. Once the fire is steady, add larger firewood pieces one at a time. Leave space between the logs so oxygen can keep feeding the flame.
Helpful Fire‑Building Techniques
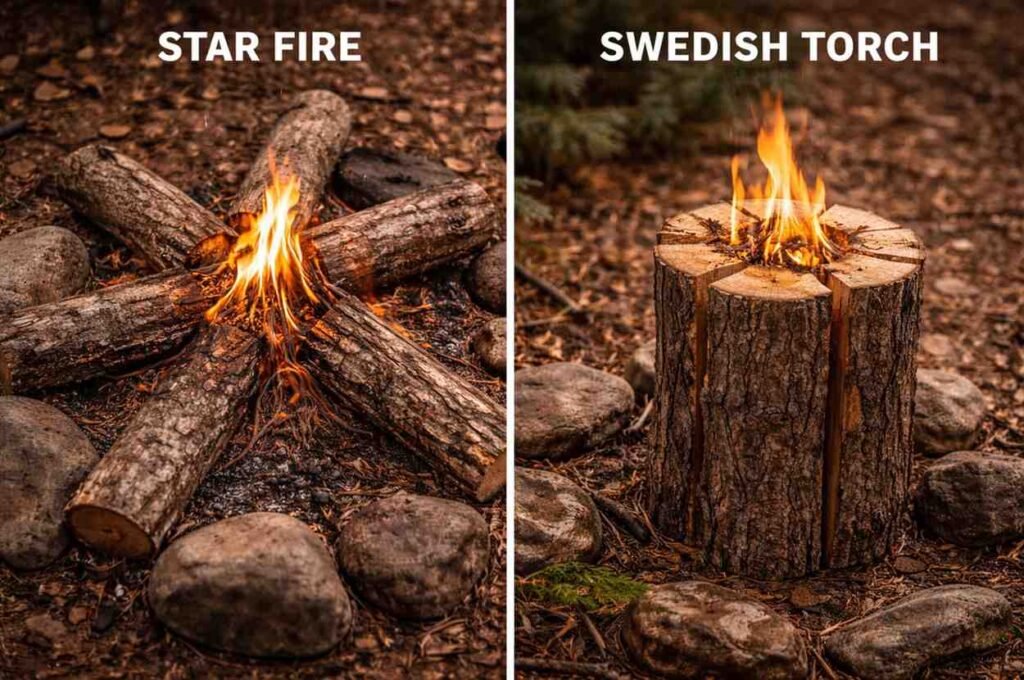
Star Fire
Arrange logs in a star pattern with ends meeting at the center. As the fire burns, push logs inward gradually. Great for longer burns with less wood.
Swedish Torch
Stand a log upright, cut an “X” on top, fill it with tinder, and light. This creates a self‑contained, long‑lasting fire that doubles as a cooking surface.
Safety Tips for Fire Building
Never Leave a Fire Unattended
Always keep an eye on your fire and have water or sand within reach.
Respect Local Regulations
Many parks and recreation areas impose fire bans during high risk periods. Always check before you light fire.
Choose Appropriate Fuel
Don’t burn trash, plastic, or treated wood. These materials can release toxic fumes and increase safety hazards.
Frequently Asked Questions (FAQs)
1. What’s the easiest way to light fire when it’s damp?
Use dry tinder like cotton balls dipped in wax or commercial fire starters. Look for sheltered kindling under logs or in dead branches — these are often drier.
2. How do I put out a fire safely?
Pour water slowly onto the embers, stir with a stick, and repeat until everything is cool to the touch. Never leave a fire until it’s completely extinguished.
3. Can I use green wood to start a fire?
Green or “living” wood contains moisture, causing smoke and difficulty lighting. Use seasoned, dry wood instead.
4. What materials should I avoid burning?
Avoid plastics, treated lumber, and anything with chemical coatings. These release harmful fumes and can pose health and fire hazards.
Conclusion: Enjoy the Warmth After You Light Fire
To light fire safely and successfully, you need the right materials, structure, and safety practices. Whether you’re building a campfire under the stars or starting a fire pit for a cozy night, prioritizing safety and understanding the basics will help you create and enjoy your fire responsibly. Practice makes perfect — and knowing how to build and manage fire is a skill you’ll use again and again.
Author
admin@livehappyinspired.com
Related Posts

Building a Care Plan for Aging Parents: A Complete Family Guide for Support
- 0
- 1,038 word
As parents age, their needs often become more complex, requiring thoughtful planning to ensure safety, comfort, and dignity. A well-structured care plan...
Read out all
Productivity Hacks for Working Moms: Streamline Your Day and Reclaim Your Time
- 0
- 755 words
Between navigating corporate deadlines, managing school schedules, and trying to maintain a semblance of a personal life, being a working mom is...
Read out all
The Runner’s Guide to Better Training Habits
- 0
- 848 words
Running is often perceived as a simple sport—you put on your shoes and head out the door. However, anyone who has trained...
Read out all
Why a Criminal Defense Attorney in Utah Matters More Than Most People Realize
- 0
- 1,920 word
The Real Problem Is Not Just the Charge A criminal case is rarely just about the allegation in front of you. It...
Read out all
7 Things Students Schedule During School Breaks
- 0
- 844 words
When the final bell rings before a major school break, the immediate temptation is to turn off all alarms and do absolutely...
Read out all
Exploring the Benefits of an Online MBA in Australia
- 0
- 1,128 word
In recent years, the pursuit of a Master of Business Administration (MBA) has become increasingly popular among professionals seeking to advance their...
Read out all